The topic Woodworking Toy Projects for Kids and Parents is currently the subject of lively discussion — readers and analysts are keeping a close eye on developments.
This is taking place in a dynamic environment: companies’ decisions and competitors’ reactions can quickly change the picture.
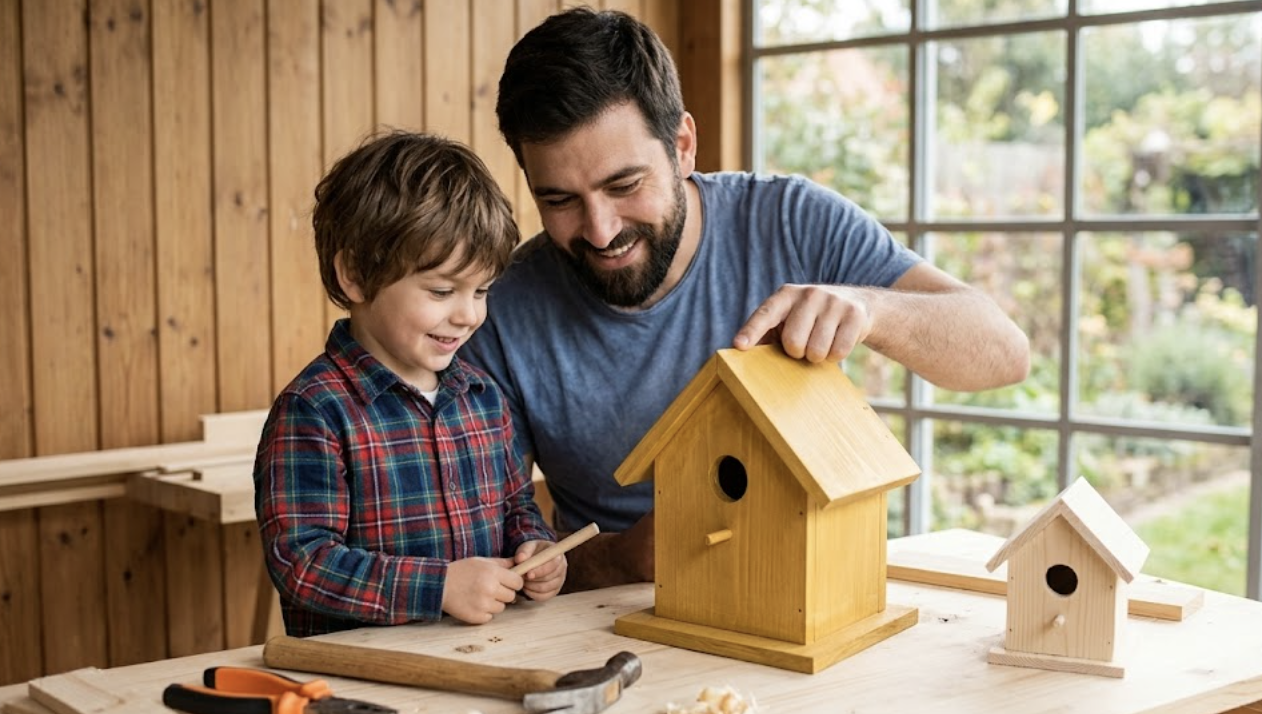
Some of the best time you’ll spend with your kid isn’t at a theme park or in front of a screen. It’s standing side by side at a workbench, turning a plain piece of pine into something they helped build with their own hands.
These three woodworking toy projects are designed exactly for that. Each project comes with a full materials list, cut list, and step-by-step instructions with roles clearly assigned. And the teamwork moments? Those are the ones you’ll both remember. We’ve also put together free downloadable plan PDFs for every single project below. Print them out, stick them on the workbench, and you’re ready to go.
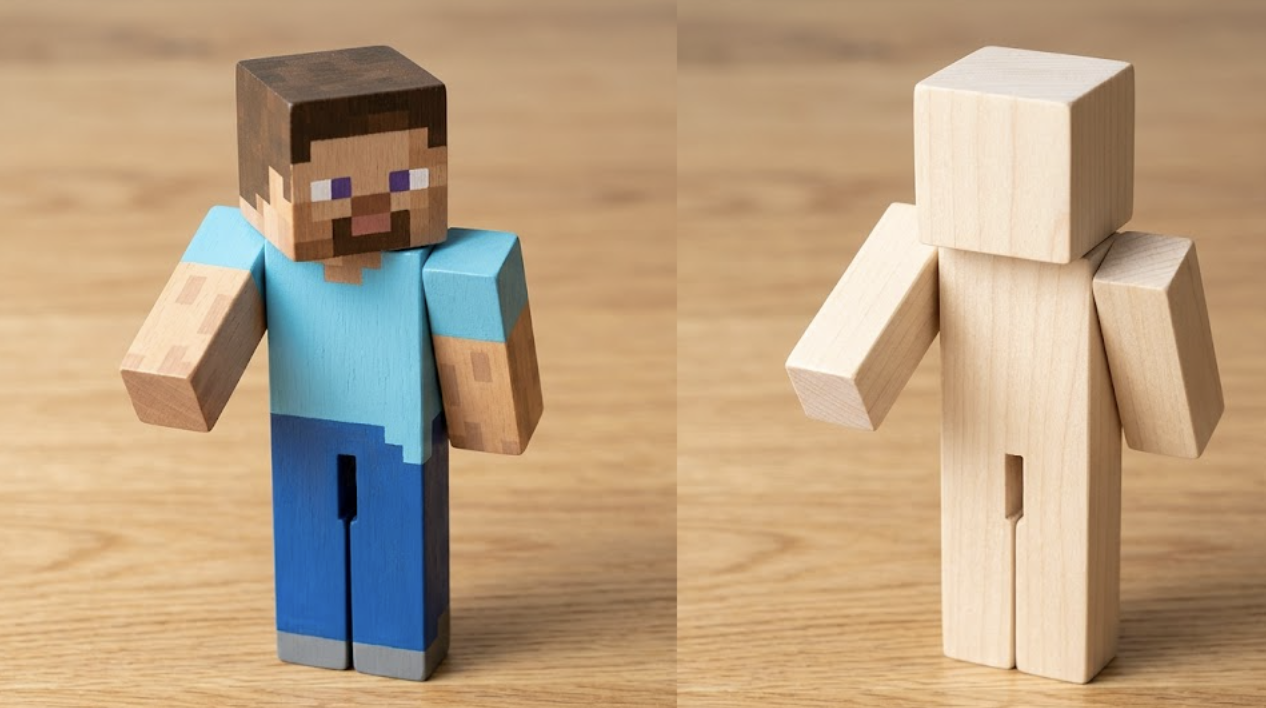
There’s a good chance your kid already knows exactly what this minecraft character is supposed to look like. That makes it the perfect first build. They’ve got a vision. Your job is to help them pull it off.
This pocket-sized Minecraft figure stands about 6.25 inches tall and uses basic hobby lumber you can grab at any hardware store. The joints use wood dowels so the head and arms can actually move, just like the game.
📄 Want the full tutorial with exact dimensions, drill depths, and a printable cut list? Download the free Minecraft figure plan PDF here.
I grabbed this Apple Barrel set after seeing thousands of parents rave about it, and it’s been an absolute game-changer for weekend projects with my kid. It goes on like absolute butter and dries so fast that even my chaotic little artist couldn’t smudge the flawless finish!
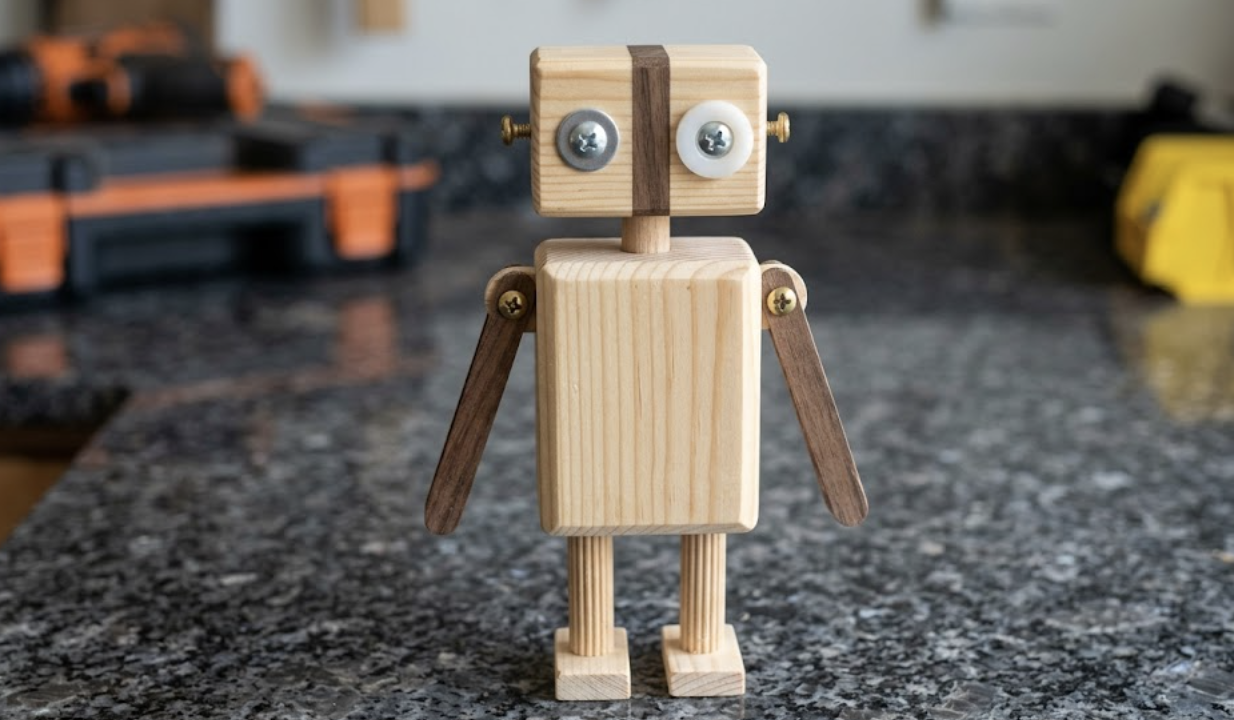
This one’s got personality. The wooden robot is made of scrap pine blocks, a handful of hardware store fasteners, and a dark wood accent strip to build a little guy that actually has articulated arms, screw-bolt eyes, and brass ear details.
It’s pocket-sized, about 14 to 15 cm tall, and the hardware bits make it feel like a real workshop creation rather than a craft project. Kids love picking out the washers and bolts that become the eyes. No two robots ever look exactly the same.
📄 Want the full tutorial with exact drill depths, hardware specs, and a printable cut list? Download the free robot toy plan PDF here.
To save you from a frustrating afternoon of hunting down massive contractor packs of tiny screws and non-toxic materials, here’s a lineup of items I got before making this project with my kid:
No glue. No nails. Just two pieces of wood that slot together and stand on their own. That’s the magic of this interlocking dinosaur build, and it never gets old watching a kid slide the legs into the body for the first time and see the whole thing stand up.
The body comes from 3/4″ stock. The legs come from 1/2″ stock. The slots hold everything together with light friction, which means your kid can take it apart and put it back together as many times as they want.
📄 Want the full tutorial with the printable dino template, slot tolerances, and grain alignment tips? Download the free dino toy plan PDF here.
I didn’t have the time to track all of the materials down at a local hobby shop. I ended up grabbing all these exact budget-friendly essentials right here:
Here’s the thing nobody tells you before you try one of these projects: the toy isn’t really the point.
Sure, your kid’s going to love the finished Minecraft figure or the robot with the mismatched bolt eyes. They’ll show it to every person who walks through your front door. But what they’re actually going to carry with them is something bigger.
They’re going to remember the afternoon they stood next to you at the workbench. The smell of fresh-cut pine. The moment the dino stood up on its own for the first time. The pride of pointing at something and saying “I made that.”
We want to see your finished toys. Tag us on Facebook, Pinterest, and Instagram with your build photos and tell us which project your kid claimed as their favorite. Drop your build pics in the comments too. Nothing motivates the next weekend warrior like seeing a real family’s finished work.
1. What are the best woodworking toy projects for kids just starting out? The interlocking dino toy is the easiest starting point for younger kids since it doesn’t require glue or hardware. The Minecraft figure and robot are great next steps once they’re comfortable with basic sanding and assembly. All three woodworking toy projects in this guide are designed with beginners in mind.
2. What age is appropriate for woodworking toy projects for kids? Most of these builds work well for kids ages 5 and up with strict adult supervision. Younger kids can handle sanding, painting, and assembly tasks while parents handle all cutting and drilling. The role assignments in each project make it easy to keep young hands safe without sidelining them from the fun.
3. Do I need a full workshop to build these toy projects? Not at all. A workbench, a hand saw, a drill, and a few clamps will get you through all three projects. You don’t need a scroll saw or bandsaw, though they’ll speed things up. Most of the materials are available at any hardware store for under $25 per project.
4. Can I use pallet wood for these woodworking toy projects? Only use pallets stamped “HT” (heat treated). Avoid any pallet stamped “MB” since that indicates methyl bromide treatment, which isn’t safe for kids’ toys. Better yet, grab fresh hobby lumber from the hardware store for toy builds. It’s cleaner, easier to sand, and safer for little hands.
5. What’s the safest finish to use on wooden toy projects for kids? Food-grade mineral oil and beeswax paste are the safest options for toys that’ll be handled regularly by kids. Both are non-toxic, easy to apply, and bring out the wood grain beautifully. Skip polyurethane and oil-based stains for anything a child will be touching or putting near their mouth.
Did you like the build plans? Suggest what blueprints should we make next. Comment down below.