The topic How to Build a Cordless Tool Wall Rack Storage is currently the subject of lively discussion — readers and analysts are keeping a close eye on developments.
This is taking place in a dynamic environment: companies’ decisions and competitors’ reactions can quickly change the picture.
This build takes 3 to 4 hours start to finish. You’ll spend approximately $45–$65 on one sheet of plywood plus finish. Skill level is beginner-friendly; if you can run a circular saw and a drill, you’re good. The result is a wall-mounted tool organizer with 4 tool bays and an integrated charging shelf.
RELATED: How to Build a Garage Pegboard Wall in Under an Hour
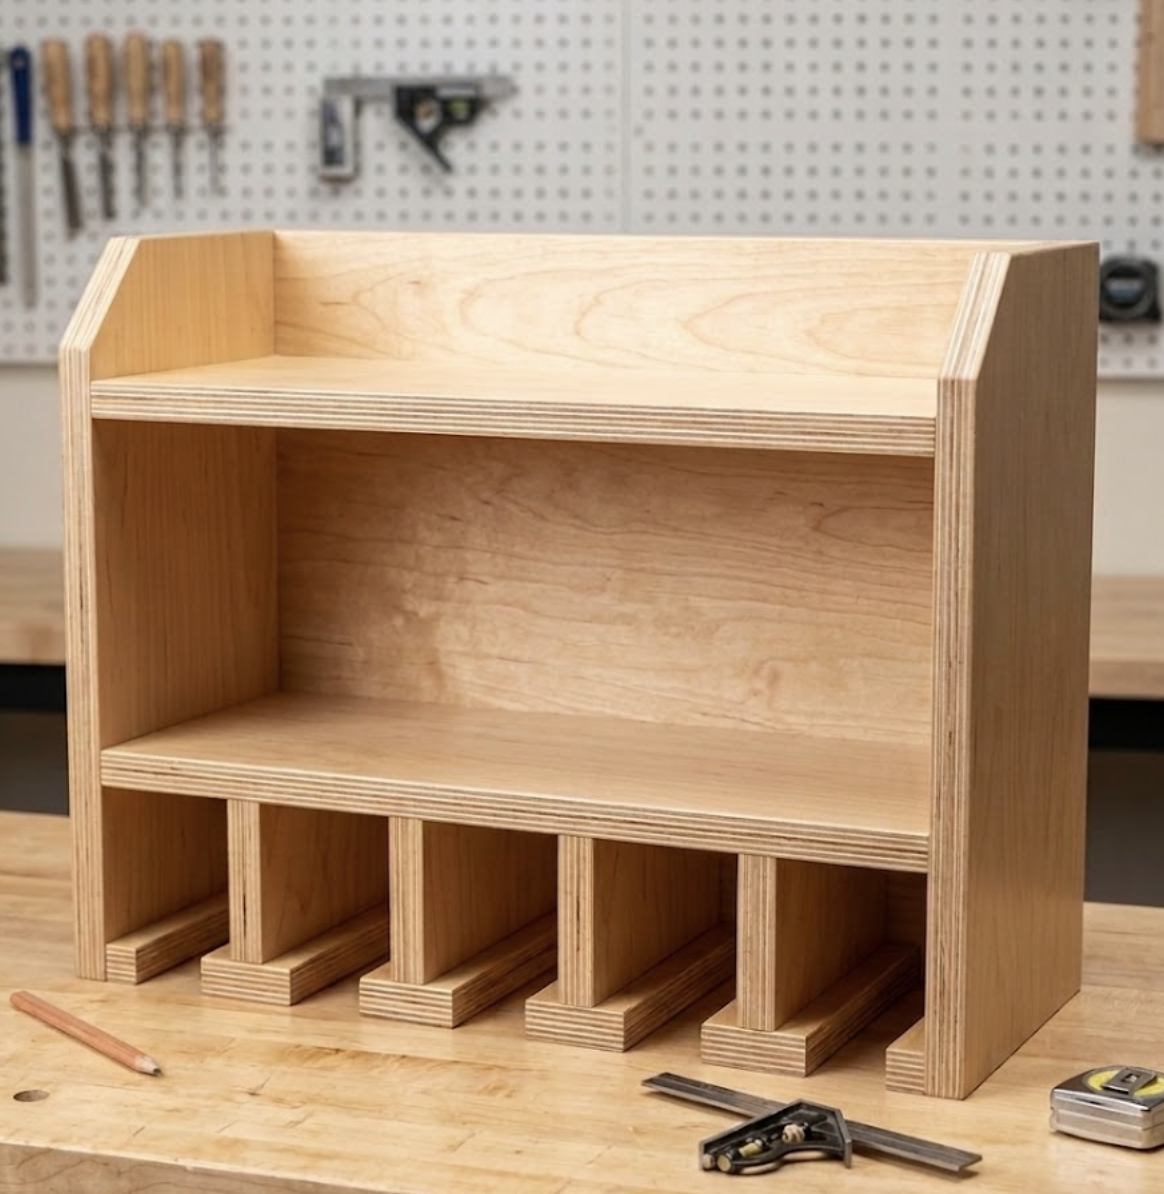
Picture a wall-mounted shelf with a row of upside-down “T” shapes along the bottom. Each T has a flat piece that sits on the shelf (the T-Spacer) and an upright piece that sticks up (the Vertical Divider). The gaps between these upright pieces are your tool slots; your drills hang handle-down in those gaps.
Above the tool slots, there’s a second shelf for your battery charger, with a hole in the back for the cord to drop through and stay hidden.
That’s it. A box, two shelves, and four or five T-shaped dividers.
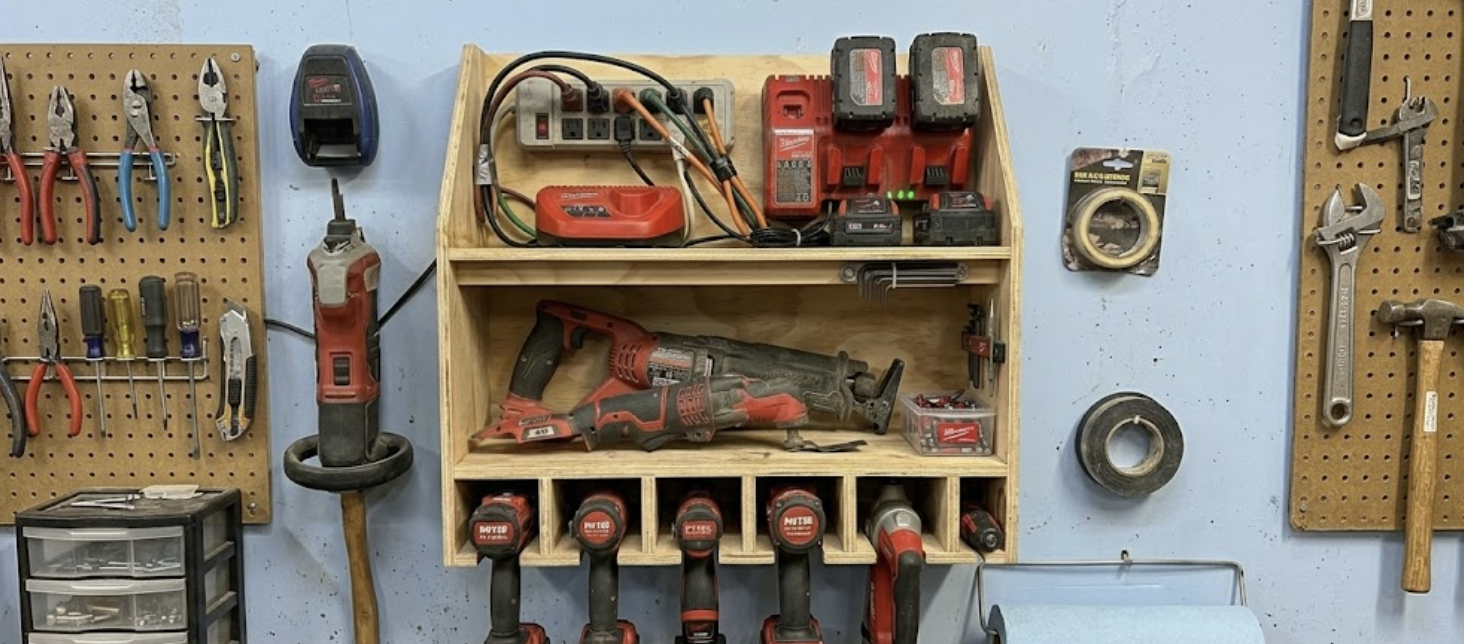
Store-bought drill racks use oversized 3-inch slots designed to fit “any tool.” The problem is that 3 inches is too loose for most cordless drills. Your impact driver wobbles, slides forward, and eventually nose-dives onto your workbench.
This DIY drill storage rack uses a T-slat system with 2″ slots wide enough for any standard drill or impact driver, snug enough to eliminate wobble. Works with DeWalt, Milwaukee, Makita, Ryobi, or a mix of all four.
You’ll also add a built-in tool charging station DIY style a dedicated shelf for your charger with a grommet hole for cord management. Batteries stay topped off without cluttering your bench.
One sheet of plywood costs about $45 to $65 these days. Our free Cut List Optimizer makes sure you only buy what you actually need. Plug in your cuts, get a layout, skip the second trip to the store.
Step 1: Cut and Sand If you don’t have a table saw, a circular saw with a straightedge guide works for all main cuts. Sand all edges with 120-grit sandpaper before assembly to remove splinters and help your paint stick.
Step 2: Build the T-Slat Assemblies Lay one T-Spacer flat. Stand a Vertical Divider upright on the center point, apply wood glue, and drive two 1½” screws through the bottom of the spacer into the divider. Repeat for all five assemblies.
Screws are great for holding things in place, but glue is what actually makes a project like this last for a decade. I always reach for titebond because it gives me a few extra minutes of ‘wiggle room’ to get those tool slots perfectly aligned before the glue hardens.
Optional improvement: Bevel or round the front edges of the T-Spacers with sandpaper or a router. This makes sliding tools in and out smoother.
Before the dividers go in, drill a 1½” hole in the back corner of the Middle Shelf. Position the hole about 2″ from the back edge and 2″ from one side for cord management.
Since you’re building a custom shelf for your chargers, you need a power source that’s as tough as your tools. I dig this metal strip because those big power tool chargers always take up more room than they should, and the wide spacing here actually lets you use every outlet without them blocking each other. Here’s what I use:
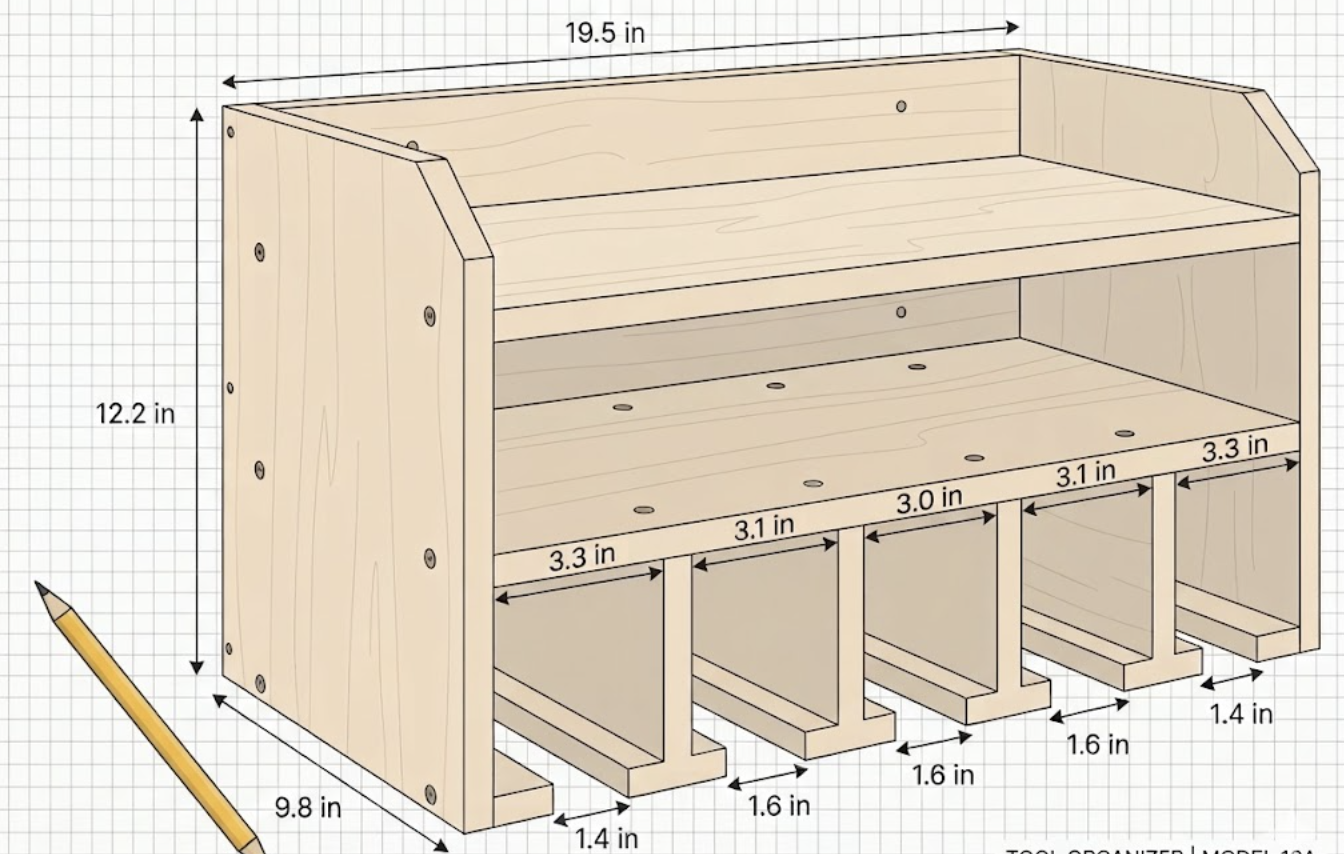
This is where your precision spacing matters to ensure a snug, “wobble-free” fit for your tools. Instead of a single 2″ jig, cut two scrap blocks: one exactly 1.4″ wide and one exactly 1.6″ wide.
Check your work: You should have two 1.4-inch gaps on the ends and three 1.6-inch gaps in the middle. If a gap looks off, remove and reposition it before the glue dries.
If you use stick-style batteries (common on 12V compact tools), drill two or three 1″ holes into the left exterior Side Panel. Space them about 3″ apart vertically. Batteries slide in and stay put.
Do this before mounting it to the wall. It’s easier to paint a rack on your workbench than on the wall.
I know it’s tempting to jump straight to driving screws, but I always regret it if I don’t sand the plywood edges first. I use a high-quality 120-grit paper to knock down splinters and bevel the front edges of the tool slots.
Critical: Anchor into at least two wall studs. Cordless tools plus batteries can exceed 30 pounds. Drywall anchors alone will fail.
Mounting height tip: Position the rack so your tool handles hang at roughly chest height. This makes grabbing tools comfortable and keeps heavy items at a stable height.
Stay connected with us on Facebook, Pinterest, and Instagram!
How much weight can this cordless tool wall rack hold? Mounted into two studs with 3″ screws, this rack safely holds 40+ pounds enough for 4 cordless tools plus batteries and a charger.
Will the 2″ slots fit my tools? Yes. The 2″ slot width fits standard drills and impact drivers from DeWalt, Milwaukee, Makita, and Ryobi. If you have a high-torque impact or angle grinder with a larger handle, measure the neck and widen your end slot to 2½”.
Can I make this bigger for more tools? Yes. Extend the Back Panel width to 36″ or 48″ and add more T-assemblies. Keep the 2″ slot gaps and 3″ center-to-center spacing throughout.
Do I need a table saw? No. A circular saw with a straightedge guide works for all the main cuts. For the ½” T-Spacers, ask the hardware store to rip a ½” strip for you, or cut carefully with a circular saw and clamped guide.
What’s the best way to mount the charger? Most chargers have keyhole slots on the back. Drive two pan-head screws into the back edge of the Middle Shelf, spaced to match the slots. Slide the charger onto the screws so they’ll lock in place and won’t lift off when you pull a battery.
How do I keep batteries from draining while stored? Modern lithium batteries have built-in discharge protection. Storing them at 30–50% charge extends lifespan. An auto-off power strip prevents chargers from cycling unnecessarily when batteries are full.