The topic How to Build a French Cleat Tool Wall (Beginner’s Guide) is currently the subject of lively discussion — readers and analysts are keeping a close eye on developments.
This is taking place in a dynamic environment: companies’ decisions and competitors’ reactions can quickly change the picture.
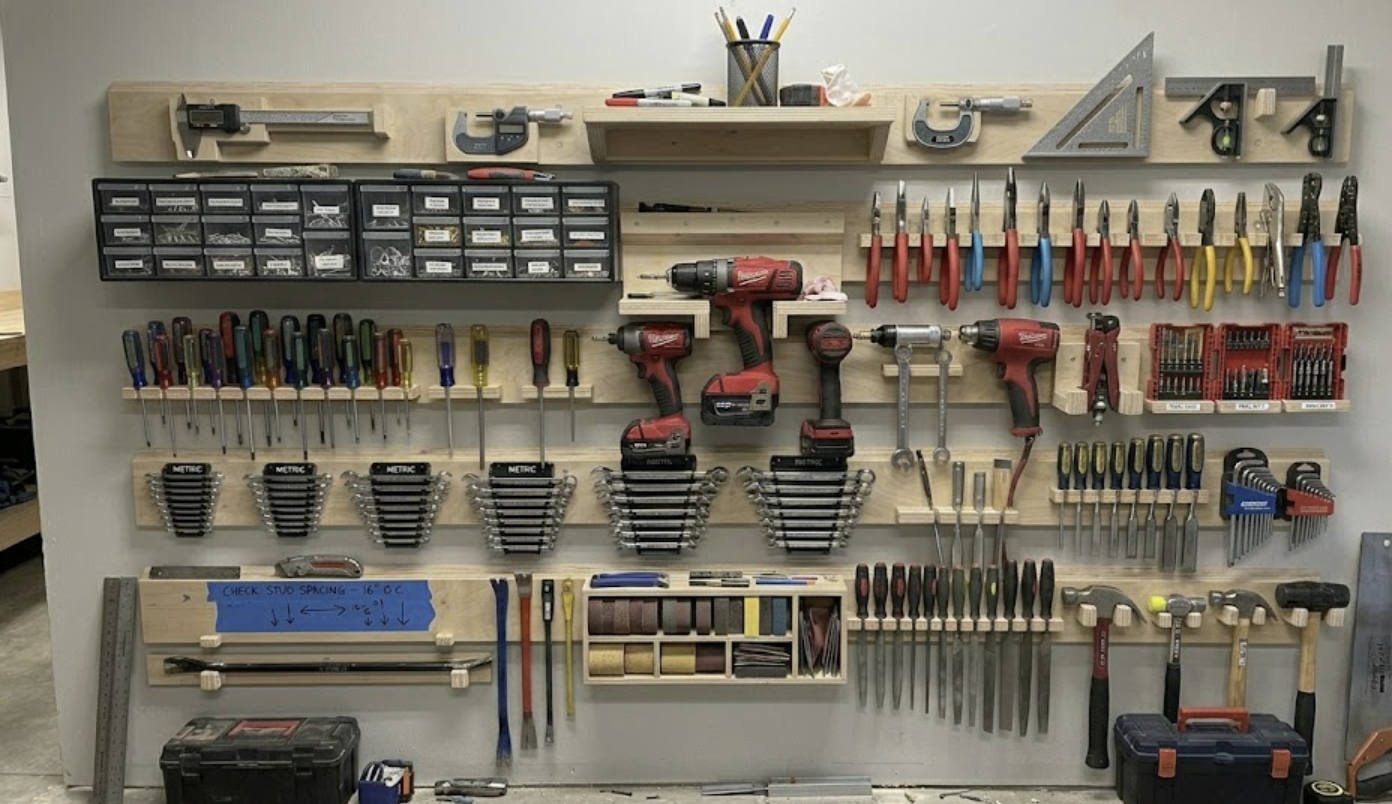
A French cleat tool wall is a modular storage system that lets you hang, move, and reorganize tools without drilling new holes in the surface. It uses two interlocking 45-degree beveled strips to hang gear and store accessories. One strip mounts to the wall with the bevel facing up. A matching strip attaches to your tool holder with the bevel facing down. Gravity locks the two pieces together without any additional hardware.
This section walks through the complete installation of a French cleat tool wall in nine steps.
Time Check: Set aside a full afternoon. Rushing leads to crooked cleats and wasted wood.
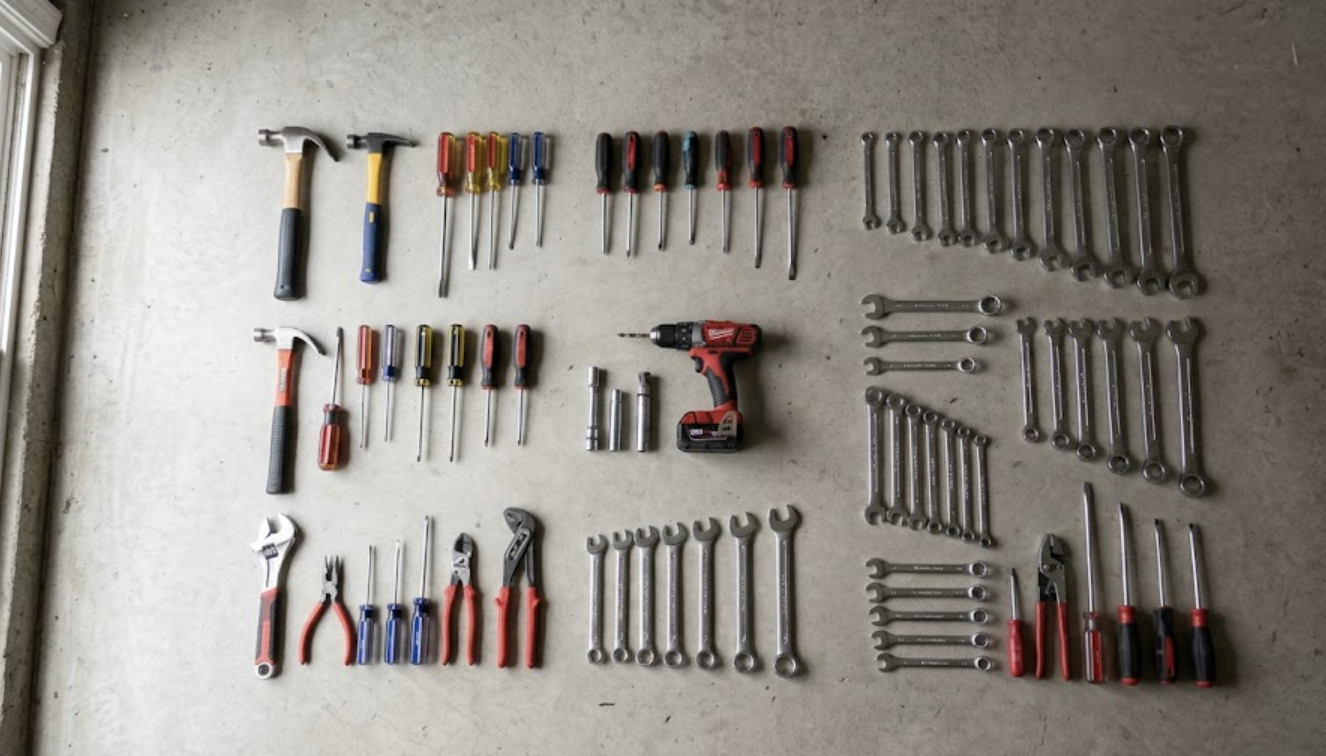
Place every tool you plan to hang on the garage floor in the arrangement you want on the wall. Take a photo of the layout for reference.
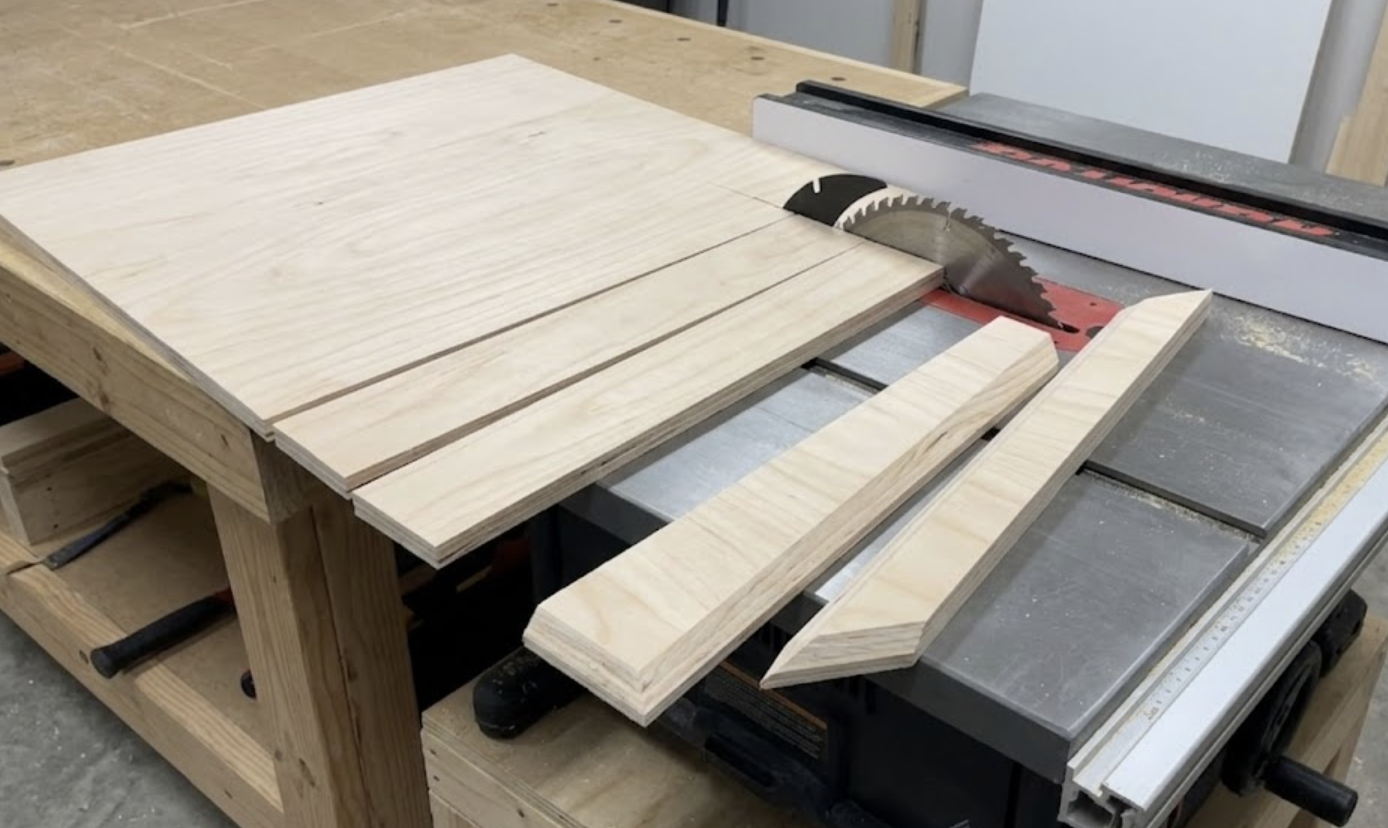
Rip a sheet of ¾-inch plywood into 4-inch-wide strips. Then tilt your saw blade to 45 degrees and rip each strip down the center. One angled cut produces two matching cleats.
Pro Tip: Cut all your cleats in a single session. Batch cutting saves setup time and ensures consistent angles across every strip.
New to woodworking projects? Try our free Cut List Optimizer. It gives you a printable layout with accurate dimensions to avoid wasting a good sheet of plywood.
Run each cleat through the saw one more time and shave approximately ⅛ inch off the sharp point. Doing so prevents splinters and protects your fingers when handling the cleats.
Checkpoint: You should now have a stack of beveled cleat strips with blunted points. If your strips have inconsistent widths, your fence probably shifted during cutting. Re-cut before continuing.
Use a stud finder to locate every stud across the section of wall you are using. Mark each stud clearly with painter’s tape or pencil.
Warning: French cleats can hold weight only when the screws are properly installed into solid wood. Drywall alone won’t support your tools. If you skip this step, your holders will pull out of the wall under load.
I’ll admit I used to just “knock” on the wall and hope for the best, but trust me, a heavy tool wall will rip right through drywall if you’re even a half-inch off the mark. I’ve used this specific model for years:
Use a 4-foot level to draw a horizontal line where you want your first cleat. This line serves as your reference for every cleat that follows. Take your time here. A crooked first cleat means a crooked entire wall.
By the way, for the painter’s tape, I use this exact product below. It’s surprisingly thick and way more durable than the cheap stuff. Just a heads up that the rolls are a bit smaller than the standard American size, but for the price, it’s a total shop essential.
Position the cleat so the 45-degree bevel faces up and angles back toward the wall. Drive 2½-inch screws through the cleat and into each stud using two screws per stud.
Beginner Note: The bevel direction matters. If the bevel faces the wrong way, your holders won’t lock. Remember: wall cleat bevel faces up while the holder cleat bevel faces down.
Use a scrap 2×4 as a spacer between cleat rows. Place the spacer on top of the installed cleat, rest the next cleat on top of the spacer, and screw it in. This method produces consistent 3½-inch gaps.
Repeat until you have covered your planned wall section. For a 4-foot starter wall, three to four horizontal cleats is sufficient.
Cut a backer panel from ¾-inch plywood. Attach a matching cleat to the top of the backer with the bevel facing down. Then attach a ¾-inch spacer block to the bottom of the backer.
Warning: The spacer block is not optional. Without this spacer, the holder tilts inward and tools slide off. This single missing piece causes the majority of french cleat tool wall failures.
Slide the completed holder onto the wall cleat. The holder should lock in place and sit flat against the wall. If the holder tilts inward, the spacer block is either missing or too thin. Add material until the holder hangs vertically.
Checkpoint: By now you should have cleats mounted on the wall and at least one working holder hanging in place. If something feels wobbly, check your spacer block thickness and confirm your screws hit studs.
I love a good custom wooden wrench set but filing out a dozen individual slots can be a total nightmare for a beginner. I eventually switched to these tiered plastic organizers that I just bolt onto a standard 3/4-inch backer panel to get that perfect layout in minutes. It’s the easiest way I’ve found to keep my Metric and SAE sets separate and easy to grab without the tools sliding around. I got my wrench organizer here:
This project is completely DIY-safe for most homeowners. There is no electrical work, no plumbing, and no load-bearing structural changes involved.
If your shop wall is made of concrete block or poured concrete, you will need a hammer drill or SDS rotary hammer along with Tapcon concrete screws. If you do not own this specialized tool and do not want to rent one, consider hiring a handyman to mount the first row of cleats for you. Once the cleats are attached to the concrete, you can handle the rest of the project yourself.
Time Check: A handyman can mount cleats on a concrete wall in under an hour. Budget $75 to $150 for this service, depending on your area.
Want more DIY? Follow DIY Projects on YouTube, Instagram, Pinterest, and Facebook.
You do not need a router bit. A 45-degree bevel cut on a table saw or circular saw produces the same result. Router bits designed for French cleats exist, but they add cost without providing any real benefit at this scale.
Start by locating the wall studs. Draw a level reference line on the wall. Screw the cleats to the studs with the bevel facing up and angled toward the wall. Space the cleats 3 to 5 inches apart using a scrap block as a guide.
You can attach cleats over drywall only if the screws pass through the drywall and penetrate the studs behind it. Drywall alone cannot support the weight. Use screws that are at least 2½ inches long to ensure adequate penetration into the stud.
Where can I find free French cleat tool storage holder plans?
Fix This Build That, Woodworking for Mere Mortals, and Neat French Cleat all offer free downloadable plans. A drill holder or clamp rack makes a good first project for beginners.
Leave the 45-degree mating surfaces raw and unfinished. Paint or polyurethane on the bevel can cause the cleat and holder to stick together over time. If you want a finished appearance, apply paint or sealer only to the face of the cleats and the backer boards.
Space cleats 3 to 5 inches apart for small hand tools and consumables. Use 6 to 8 inches of spacing for larger power tools and cabinets. Avoid covering the entire wall with cleats on day one so you have room to expand later.
What is the best wood for a French cleat tool storage system?
Three-quarter-inch plywood is the standard material. Baltic Birch is the premium choice because it has more laminations and no voids. CDX construction plywood works well for budget builds. Solid wood, such as pine or poplar, also works but may warp over time in humid environments.
French cleat walls. Brilliant storage system or total plywood eyesore?
I’m curious about the ‘why’ behind your choice. Tell me more in the comments about the actual storage system you’re using right now and why it works (or doesn’t) for you.