The topic DIY Built-In Cabinets That Look Expensive is currently the subject of lively discussion — readers and analysts are keeping a close eye on developments.
This is taking place in a dynamic environment: companies’ decisions and competitors’ reactions can quickly change the picture.
Built-in cabinets are the highest-impact home improvement project per dollar spent in 2026. The contractor price for a 10-foot wall of built-in bookcases ranges from $3,000 to $8,000 nowadats.
Meanwhile, the DIY version built from stock cabinets, finished with paint-grade prowess, and detailed with molding runs $400 to $1,200 for materials. The labor is yours. The result, done correctly, is indistinguishable from custom work.
This guide focuses on the specific details that separate the two outcomes.
Most built-in tutorials skip directly to the cabinet shopping list. This is the step that separates installations that look right from installations that get re-done.
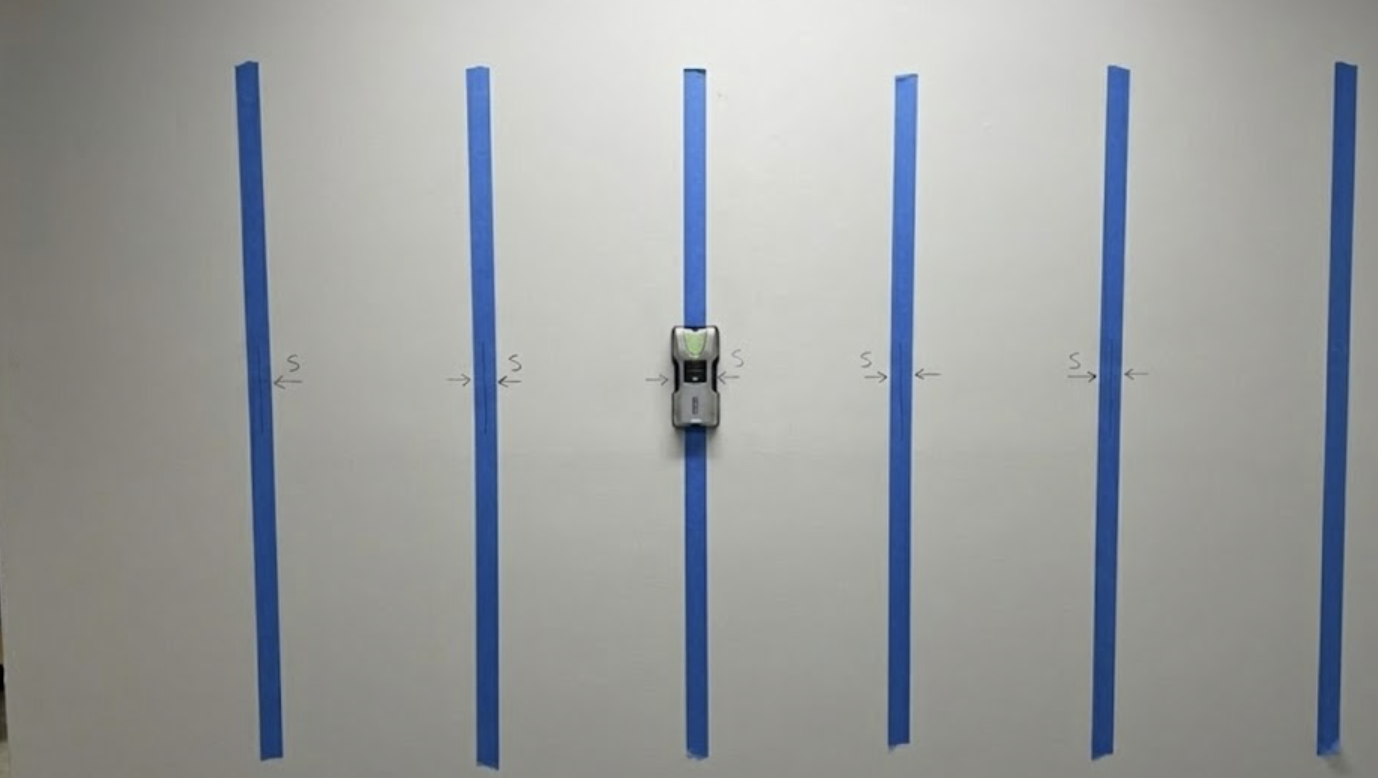
Find and mark all studs across the entire wall. Run your stud finder across the full width and height of the installation zone. Mark every stud with painter’s tape. Verify with a small nail before marking as stud finders have false positives near electrical boxes and pipes.
Check for plumb and level. Hold a 4-foot level vertically against the wall at three points: far left, center, and far right. Note how far out of plumb each point is. Do the same horizontally for floor level. This tells you how much scribe allowance to add to your cabinet sides, and whether you need to shim the base before installation.
Check for pipes and electrical. If there are any outlets, switches, or plumbing supply/drain lines on or near the wall, map their locations before designing. Built-in depth cannot encroach on a load center panel access. Outlet locations may need extension boxes once the built-ins are in place.
Check for moisture. Exterior walls and basement walls require a moisture check before any closed storage installation. A $15 moisture meter is sufficient. Readings above 15% on a wood substrate indicate a moisture issue that’ll damage cabinets.
The answer is three details that account for nearly all the visual difference between “built-in” and “boxes on a wall”: the base build-up, the scribe at the wall, and the crown molding transition. Get all three right and the cabinet quality underneath almost doesn’t matter.
Don’t set the bookcase directly on the floor. Build a base platform out of 2×4 framing, 3.5 to 4 inches tall, shimmed level across the full width of your installation. This is what the bookcase units sit on.
Shim the platform to dead level before you anchor it to the floor. Check with a 4-foot level in both directions side to side and front to back. Every vertical measurement you take from this point depends on the base being level. A 1/4-inch variation across 10 feet is enough to make the whole installation look crooked.
Once level, anchor the platform to the floor through the shims using 3-inch screws into the subfloor. The base gets covered later by base molding and shoe molding matched to your existing room profile so the framing doesn’t need to be pretty, it needs to be level.
Set your bookcase units on the platform. Do not attach them to the platform yet. Get them positioned first, then move to Step 2.
I’ve built these with IKEA units, with old kitchen cabinets, even with salvaged shelving once. Honest answer? These are the bookcases I keep coming back to. The dimensions work, the back panel is solid enough to anchor through, and the price leaves room in the budget for the molding package that actually makes it look custom. My go-to units for different tiers:
With the bookcase units sitting on the base platform, mark stud locations on the back panel of each unit. Pre-drill through the back panel, then drive 3-inch screws through the back panel into studs. Minimum two studs per unit.
If your installation includes upper shelving or a second stacked unit carrying books, add a ledger board anchored to studs at the appropriate height first, then position the upper unit against it before screwing through the back panel.
Do not use drywall anchors. The bookcases’ back panel is thin and the unit will carry real load such books, media, display items. Drywall anchors fail progressively under that kind of repeated weight and vibration. Stud anchoring doesn’t.
Once each unit is anchored, also drive a screw down through the bottom of each unit into the base platform to lock them together as one assembly.
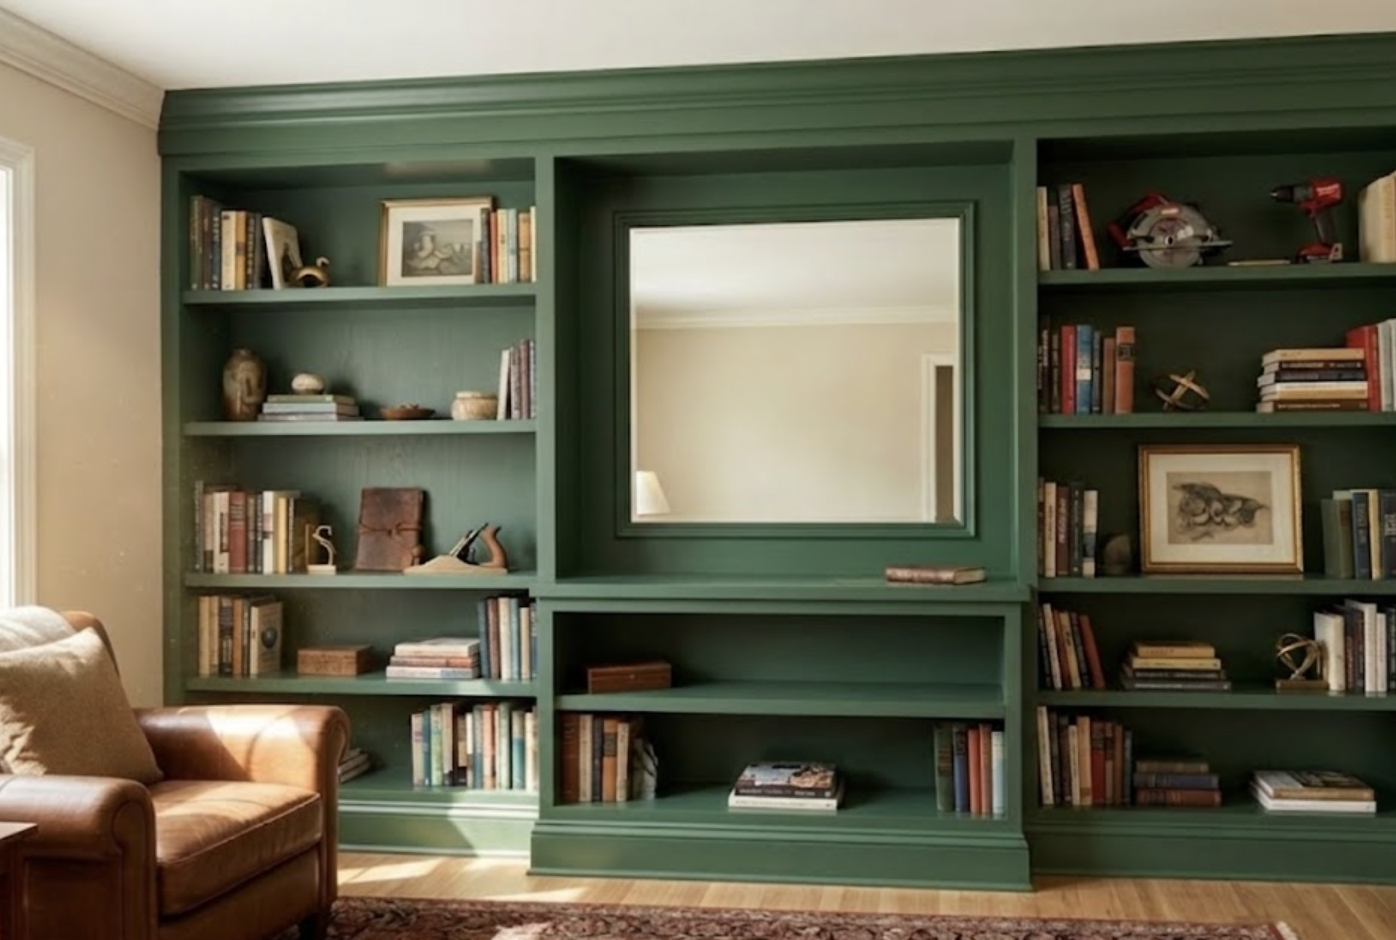
The stunning green built-in above is my ultimate inspo, by the way. I had to get a little creative with my own configuration to nail the exact dimensions! To build my setup, I used a single 7-tier bookcase on the left, placed a 3-tier in the middle to create an open center console space, and stacked a 4-tier directly on top of a 3-tier on the right so it perfectly matches the height of the left tower.
With the units anchored, measure the largest gap between the bookcase side panel and the wall on each end of the installation. Add 1/2 inch to that measurement. Cut a scribe strip, a narrow piece of matching paint-grade material, typically 1.5 to 2 inches wide to cover that gap.
Set your compass to the gap measurement and run it along the wall while marking the scribe strip. This traces the wall’s actual contour onto the strip. Cut along that line with a jigsaw. When installed, the scribed strip follows the wall exactly and closes the gap completely.
If the gap between units is visible (bookcase units butted together sometimes show a seam), run a thin bead of paintable latex caulk in the joint before painting. The unified paint coat in Step 5 covers the rest.
The molding package is what separates “bookcases against a wall” from “built-in.” Three pieces do the work.
Crown molding at the ceiling transition. Run crown between the top of the bookcase unit and the ceiling. If the ceiling isn’t level (and it usually isn’t) scribe the crown blocking to follow the ceiling line the same way you scribed the cabinet side to the wall in Step 3. Know your spring angle before you buy: standard crown comes in 38-degree and 52-degree profiles. Measure the gap between your cabinet top and ceiling first, then choose the profile that fills the space proportionally. Buying crown at the store based on looks alone is how you end up with the wrong angle and a wasted trip back.
Base molding at the floor transition. Match your existing room baseboard profile as closely as possible. Run it continuously across the front of the base platform and the bookcase kick. Add base shoe (quarter-round or flat shoe molding ) where the baseboard meets the floor to close any gap at the floor line. The goal is a continuous trim line that reads as one piece from wall to wall.
Side returns and pilasters. Where the built-in ends at an open wall, add a vertical trim element such as a painted 1×4 or a more detailed pilaster to give the installation a defined edge. Without this, the built-in looks unfinished at its termination point. This is a $10 fix that has more visual impact than almost anything else in this list.
Caulk every joint first. Between molding pieces, between molding and wall, between the bookcase face and any face frame or filler panel. Use paintable latex caulk. Smooth every bead with a wet finger before it skins over. Let it dry a minimum of 2 hours before painting.
Then paint everything, the bookcase units, all molding, and the wall surface within the built-in footprint, in one consistent color. This unified paint scheme is what creates the “it was always here” look. Two-toning the cabinets against the wall at this stage breaks the illusion completely.
Use a foam roller or brush with cabinet-specific urethane paint (Benjamin Moore Advance or Sherwin-Williams Emerald Urethane) both hold up to door handles, cleaning, and daily contact in a way standard wall paint won’t. Apply in thin coats. Sand lightly between coats with 220-grit. Do not use rattle-can spray paint. It looks fine in photos and deteriorates fast in person.
The result, across all three budget tiers, is something a contractor would have charged $4,000 to build.

The caulk brand actually matters here. I’ve used the bargain stuff and watched it crack at the molding joints within a season. DAP Alex Plus is what I buy now. It goes on smooth and takes paint without bubbling. The adhesion also holds at every joint I’ve thrown at it including the seam between butted bookcase units.
Installing built-in cabinets directly on an unlevel floor. Even a 1/4-inch floor variation across 10 feet makes cabinets look crooked. Build the base platform, shim to level, check twice.
Using rattle-can spray paint instead of a brush/roller for cabinets. Spray finishes on cabinets look beautiful in photos and terrible in person over time. Brush or foam-roll cabinet-specific paint (Benjamin Moore Advance, Sherwin-Williams Emerald Urethane) in thin coats. Sand lightly between coats with 220-grit. This finish holds up to door handles, cleaning, and daily contact.
Buying crown molding before measuring the ceiling angle. Standard crown spring angles are 38 and 52 degrees. The profile that looks right in the store may not be the correct spring angle for your installation. Measure the ceiling height and cabinet height first, then choose the profile that fills the space proportionally.
Not planning for outlet locations. If there’s an outlet behind the built-in footprint, you need an outlet extender box to bring it flush with the new cabinet face. These are a $6 part at the hardware store and a 10-minute install. Missing them means cutting into finished cabinets later.
I learned this one the hard way on my first built-in. There was an outlet behind the installation that I just forgot about. Getting it right cost me a jigsaw cut through finished cabinet and an afternoon I didn’t have. A single-gang outlet box extender before the cabinets go in is a ten-minute fix that saves you from all of that.
Painting before caulking. Paint shrinks as it cures, which opens small gaps at caulk lines if you painted first. Caulk first, paint second. The caulk must fully dry (minimum 2 hours for latex) before painting over it.
Most of this project is straightforward DIY territory even at the minimum skill level, the base/cabinet/molding approach is manageable with patience and a few weekends. But call a licensed professional for these specific situations:
Electrical relocation: If an outlet, switch, or fixture needs to move to accommodate the built-in layout, that’s licensed electrical work. Do not run new wire, move junction boxes, or relocate outlets yourself unless you are a licensed electrician. The outlet extender (described above) is a safe DIY move. Moving the box is not.
Moisture readings above 15%: A moisture problem behind a wall is a building envelope problem. Closing it behind cabinets traps the moisture and accelerates mold and structural damage. Call a contractor or waterproofing specialist before installing anything.
Load-bearing wall uncertainty: If you have any doubt about whether a wall is load-bearing, get a structural consultation before drilling, cutting, or removing anything. Particularly relevant if you’re considering a pass-through or opening as part of a larger built-in design.
The gap between a DIY built-in that looks like it was always there and one that looks like a weekend project comes down to four things: a level base, stud anchoring, scribing to the wall, and a unified paint job with good caulk work. None of these are advanced skills. All of them are skippable under time pressure, which is exactly when most people skip them.
Do the substrate check first on stud layout, plumb, level, moisture. Design to what the wall actually gives you, not to what a plan assumes. Then build the base, anchor correctly, scribe the gaps closed, add the molding, and paint as a unified installation. The result, at any of the three budget tiers, is something a contractor would have charged $4,000 for.
The secret to a high-end look lies in the finishing details. To make DIY built-ins look custom, always scribe the cabinets to the wall to eliminate gaps, install crown molding at the ceiling, and use a continuous baseboard instead of a standard toe kick. A unified paint-grade finish using high-quality urethane paint also bridges the gap between store-bought and custom-made.
Yes, using stock kitchen cabinets or flat-pack furniture like IKEA units is a cost-effective way to create expensive-looking built-ins. The key is to build a level base platform, add custom face frames, and bridge any gaps with filler panels. This “hack” saves thousands in materials while providing the structural carcass needed for a professional result.
The most common mistake is failing to anchor to wall studs. Many DIYers rely on drywall anchors, which can fail under the weight of books or media. Always locate and mark your stud layout before installation and use 3-inch cabinet screws to secure the units. Additionally, skipping the leveling and shimming process leads to crooked doors and visible gaps.
In 2026, professional built-in installation for a 10-foot wall typically ranges from $3,000 to $8,000. By contrast, a DIY built-in project using stock cabinets and DIY materials costs between $400 and $1,200. This makes it one of the highest-ROI home improvement projects for homeowners willing to provide their own labor.
For a custom-built-in look, a paint-grade finish is often superior to a DIY stain. Using a consistent color for the cabinets, trim, and wall surfaces creates a seamless, “built-in from the start” appearance. Use a foam roller or brush with cabinet-specific paint (like a urethane enamel) for a durable, smooth surface that resists wear and tear better than standard wall paint.