The topic I built a smart home dashboard for $5 and deleted three smart home apps is currently the subject of lively discussion — readers and analysts are keeping a close eye on developments.
This is taking place in a dynamic environment: companies’ decisions and competitors’ reactions can quickly change the picture.
As the number of smart home devices in your house grows, you’ll find yourself constantly making ecosystem decisions. Devices from different manufacturers don’t talk to each other, and before you know it, you’ve got half a dozen apps on your phone that you barely touch.
Setting up Home Assistant can eradicate this problem. I built a smart home dashboard using an old phone, and the days of fumbling through multiple apps were behind me. Then, I spent a weekend and a few dollars tinkering with an ESP32, an OLED display, and a few buttons, and I had a tiny smart home dashboard that never needed me to interact with another device to control my home in the first place.
Each smart home device comes with its own app, and if you’re not using devices from the same manufacturer, chances are you’re going to have as many smart home apps on your phone as you have devices in the house. Needless to say, that’s an incredibly frustrating and inefficient way of controlling what’s otherwise supposed to be a smart house.
There’s no single unifying interface that gives you access to all of the devices at once. You could try setting everything up in Google Home and controlling your smart lights with Gemini, but if your experience is anything like mine, you’ll stop wanting to do it pretty quickly.
My Home Assistant installation fixes this problem, but it still requires opening up Home Assistant in the browser or on the phone to control lights. I’ve already mounted the dashboard, so when I was at my desk, I was still using these apps. Until I decided to make another dashboard, except that it was a lot more accessible this time.
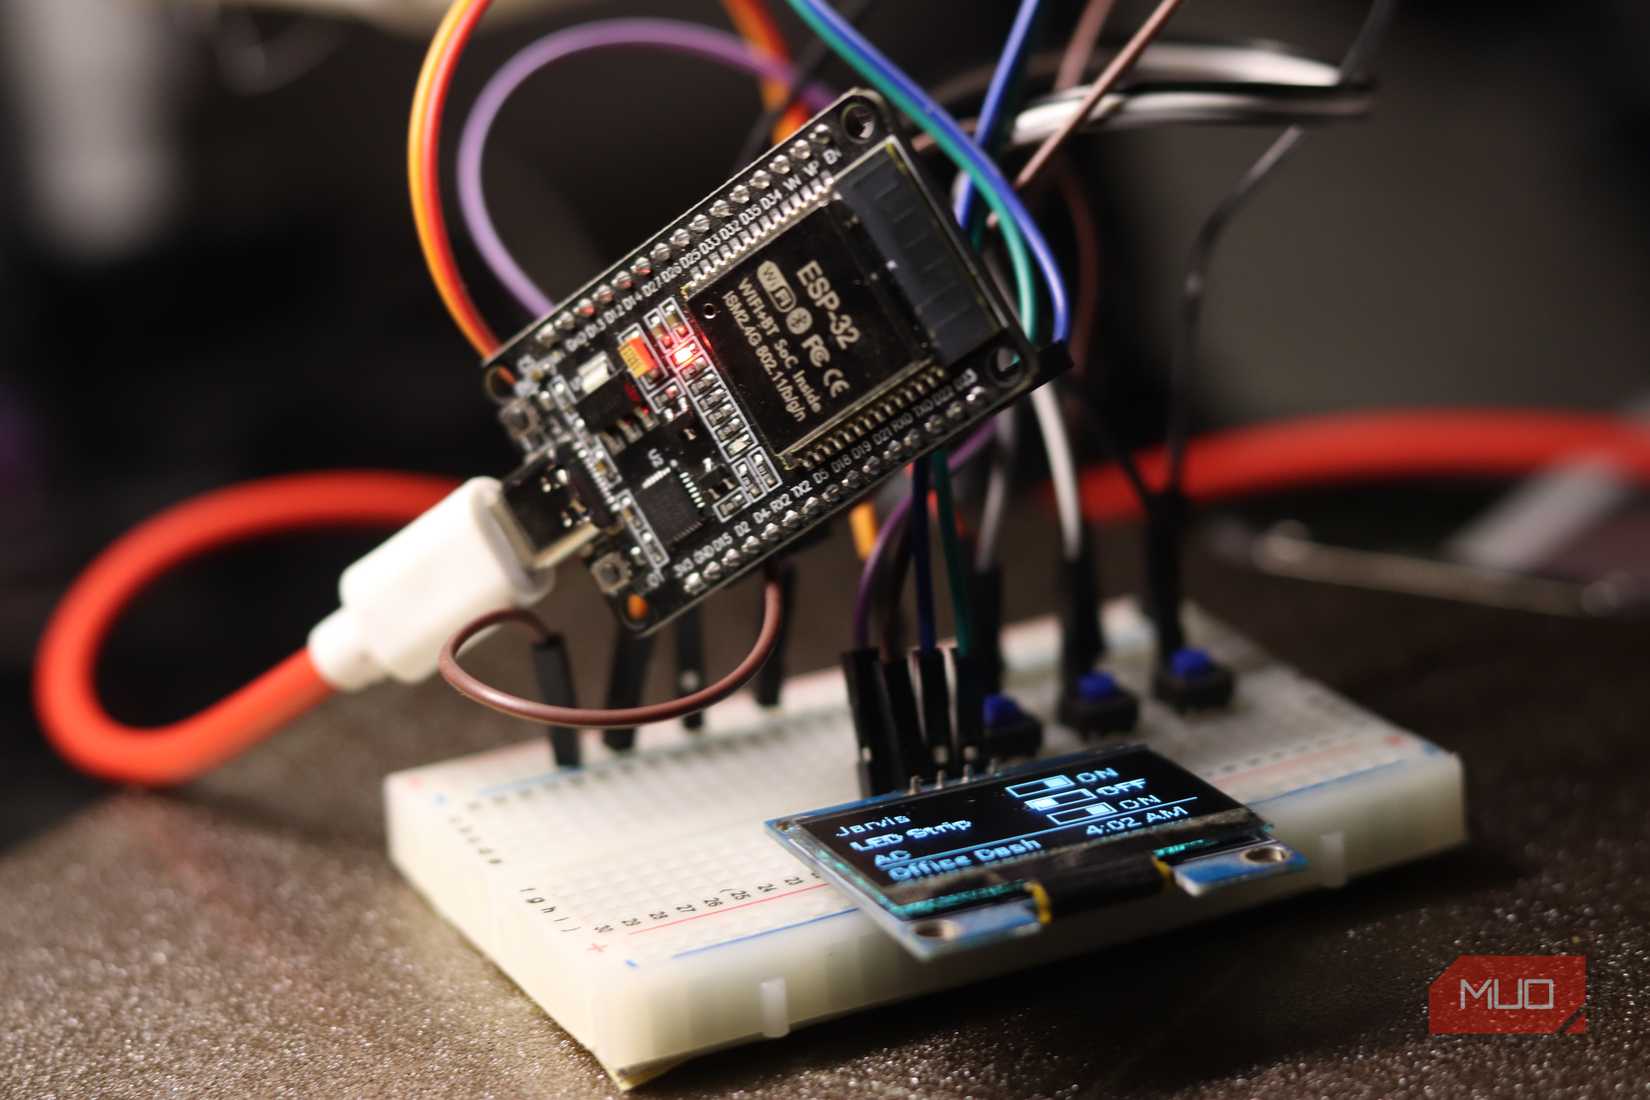
The ESP32 is an absurdly capable microcontroller for its price. For this build, I ended up using my run-of-the-mill ESP32 DevKit V1 board. This works with just about any ESP32 you can find, so there’s no risk of choosing the wrong ESP32 board.
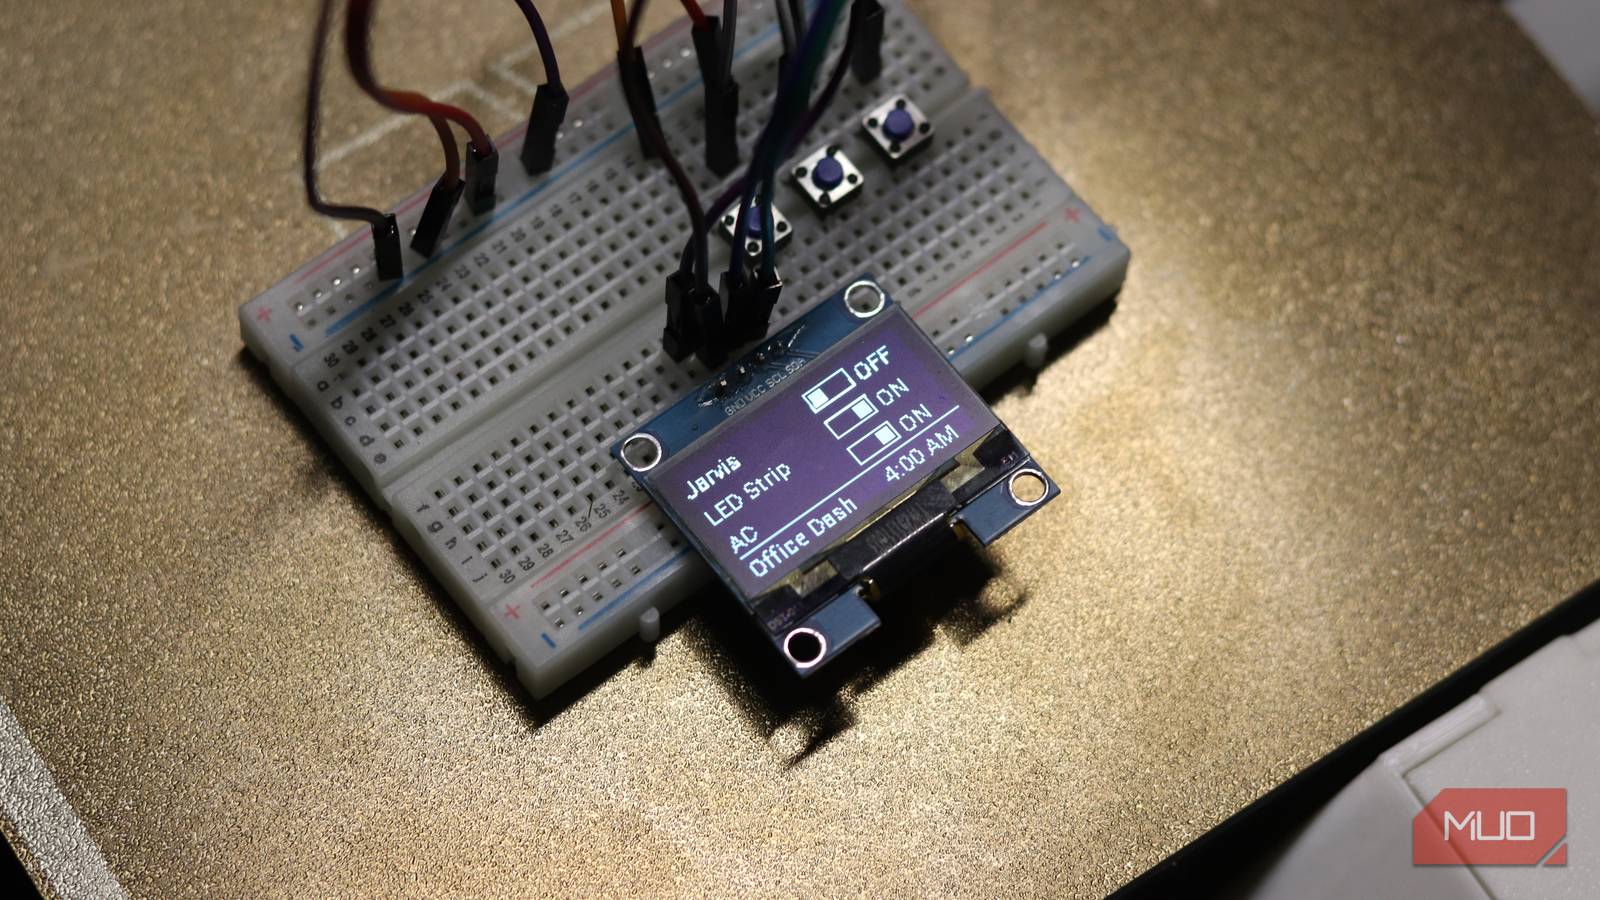
Paired with the ESP32 was a simple 1.13-inch SH1106 OLED display and three tactile push buttons. If you’re shopping on AliExpress, the total component cost comes down to just under $5. Even if you were to buy all this off of Amazon or your local electronics store, I doubt you’ll be spending significantly more.
The OLED connects to the ESP32 over I2C using just four wires. The push buttons are wired to GPIO pins with the ESP32’s internal pull-up resistors enabled, which means no extra resistors are needed. The whole thing fits on a half-sized breadboard and takes less than 10 minutes to wire up.
ESP32 is a low-cost microcontroller with built-in Wi-Fi and Bluetooth, widely used for IoT projects and DIY electronics.
Instead of writing raw Arduino firmware, which can interface with Home Assistant using a REST API, I used ESPHome. It lets you define your entire device behavior in a YAML configuration file, which means no compiling C code, no managing libraries manually, and no digging through datasheets to find I2C addresses. If you’re already running Home Assistant, ESPHome integrates natively, and your device shows up as an entity the moment it connects to your network.
The display logic for the SH1106 is handled through ESPHome’s built-in display component, with a lambda function that draws text and status icons directly onto the OLED. Each button maps to an on_press action with two toggling different lights and the third handling my air conditioner smart plug. The display shows all three devices as pill toggles with live state pulled from Home Assistant, alongside a footer with the dashboard name and current time. There’s no cloud dependency, and the whole configuration runs locally on your network.
Now exposed wires on a breadboard aren’t exactly desk decor. I can stuff everything into a small box, cut out holes for the buttons and the display, and mount everything with superglue for a cleaner look. But designing a custom enclosure in Blender and 3D printing it is the better way to go. I don’t mind an exposed breadboard on my desk just yet, but I will eventually get around to it.
Other quality of life upgrades you could add are display dimming or some sort of screen-saver. It’s possible to automatically dim the brightness of the display after a certain period of inactivity using the SH1106’s contrast register.
Overall, this tiny dashboard ended up replacing three apps for me: the Tapo app for my AC smart plug, the Syska app for my smart bulb, and the Magic Home app for my connected LED strips. Most of the time, the only control I want is to toggle these devices on or off, and that’s exactly what the dashboard does.
A $5 dashboard won’t magically fix every smart home headache, but it proves a point worth making: you need dozens of apps or subscriptions to control your own home. If you’re already running Home Assistant, the ESPHome workflow is gentle enough for beginners and powerful enough that you’ll keep reaching for it on future projects. The app drawer on your phone has enough icons on it, you don’t need to add any more.